
INITIAL EVALUATIONS
Charting the Initial Evaluation is the most complex task as it requires additional data entry for Diagnosis and Plan of Care to create the framework for the patient's therapy plan. The following are the steps:
-
Schedule and arrive the patient for an Initial Evaluation Visit Type. (go here for the steps)
-
Add Template for Initial Evaluation for your discipline (go here for the steps)
-
Complete documentation and create goals.
-
Enter "Details" including Onset Date, Signature Date, Diagnosis and Plan of Care.
-
Audit and sign off.
Setting Goals
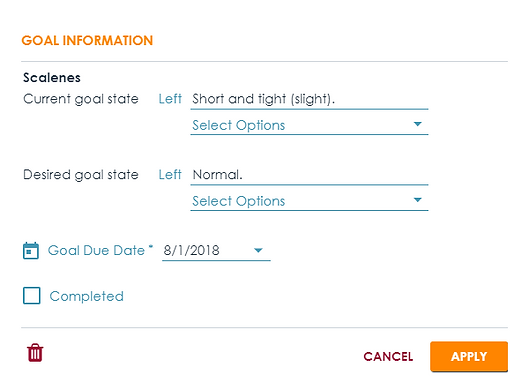
When charting a patient visit, InsightGO allows you to mark any line item as a goal for tracking. To set an item as a goal, select the Star Icon on the left of the line item.

This will open a Goal Information box where you can enter goal information. "Current State" is obtained from the data entered into the evaluation or most recent chart note. Desired goal state can be selected from Options if available or through free text. Also enter the "Goal Due Date" and then click/tap "Apply".
ADDING CONTENT
The Evaluation Templates provide the basic structure that is usually sufficient for most documentation including history, objective measures and tools and commonly used procedures. The example below demonstrates how to add content to Procedures but the process is the same for any area.
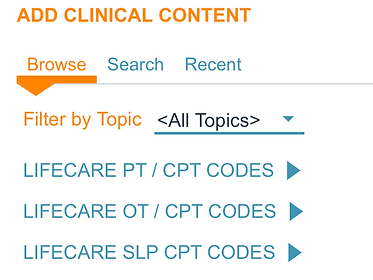
Step 1. Click/tap the "ADD" button on the right of the screen (present in each area).

Step 2. The "ADD CLINICAL CONENT" Box will open to the Clinical Content specific to your area (for example, Clicking "ADD" under Procedures will open up the "Procedures" Section. Select the desired procedure/content and click apply to add to your Note.

ADD PATIENT DETAILS
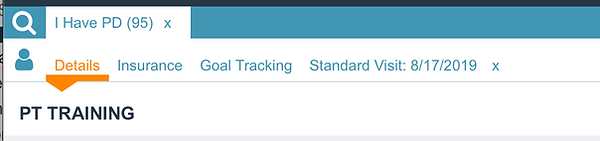
At the time of the Initial Evaluation (and at each supervisory visit or discharge visit) case details need to be entered. To start, click/tap on the Details Tab on the Chart Note.

What to Enter
Date of Onset = Date the condition started or declined
Signature Date = Date Intake was completed (enter if you completed intake paperwork with patient.
Admit Date = Date of Initial Evaluation
Diagnosis - Click on the + sign to add diagnosis to case and search by ICD-10 Code or by descriptor.
Adding POC/Progress Report
Scroll down to the Plan of Care section and click the "+" Sign to Add Plan of Care/Progress Report. At Initial Evaluation or for a Re-Certification, Choose "Plan of Care" which adds both a Certification Period and also Progress Report. System will default to current date of service and Medicare allowable certification period and # of Visits until a Progress Report is needed.
At the time of a Progress Report, just choose "Progress Report"


Click the "Save" Icon at the top right to save your changes and return to the Chart Note.
PROGRESS REPORT
The steps for a Progress Report are the same as for any other visit but also require the therapist to Update Patient Goals and Add Progress Report to Patient Details section to reset visit count.
-
Schedule/Arrive the Patient
-
Load Chart Template for a Progress Report (with or without re-certification)
-
Update Patient Goals
-
Add Progress Report to Patient Details Section to re-set visit count.
DISCHARGE
Discharge Steps
-
Schedule/Arrive the Patient
-
Load Chart Template for a Discharge Report
-
Update Patient Goals
-
Change Patient Status from Active to Discharged.
-
Enter Discharge Date & Reason.

PAPER REPORTS
Non-visit / Paper Reports provide documentation for a patient even when the patient is not seen. For example, a patient who was discharged to HH may need a "paper" report only. The steps are identical to creating any other report, but please make sure your Procedure Time/Minutes is set to "0" so that a bill is not generated.